

Howzit Everyone!

Today I'm sharing an Alice in Wonderland themed gate-fold card. I'm honoured to be the Spotlight Guest Designer for February over at the Smeared and Smudged forum and I'm having a ball creating with Smeared Ink's edgy AIW digi images! The sexy Queen of Hearts featured on the front would make this one a quirky Valentine if you so desired ;0) Check out my Mad Hatter's Top Hat project too if you missed it!


Today I'm sharing an Alice in Wonderland themed gate-fold card. I'm honoured to be the Spotlight Guest Designer for February over at the Smeared and Smudged forum and I'm having a ball creating with Smeared Ink's edgy AIW digi images! The sexy Queen of Hearts featured on the front would make this one a quirky Valentine if you so desired ;0) Check out my Mad Hatter's Top Hat project too if you missed it!
I used two of Smeared Ink's AIW digi images: Alice and Queen of Hearts and printed them out on to Neenah Solar White cardstock. Both images were then coloured with the following Copic markers: E0000,00,02,15, 19, 41, 43, 44, BV01, 02, 04, B34, Y11, 15, YG00, G82, 85, C3, 5, R39, 46 and used the O Colourless Blender to create a speckled texture on the large mushroom as well as for blending and creating highlights.

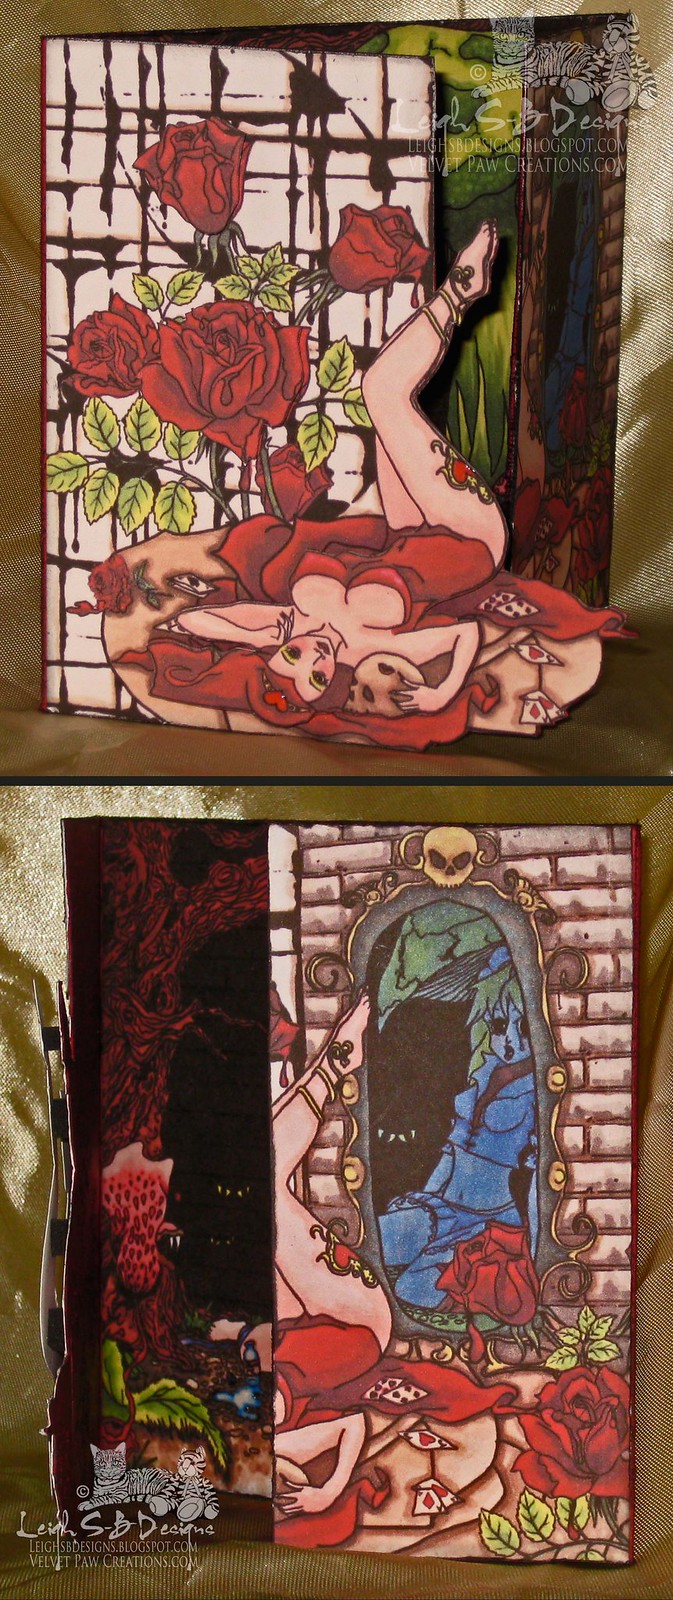
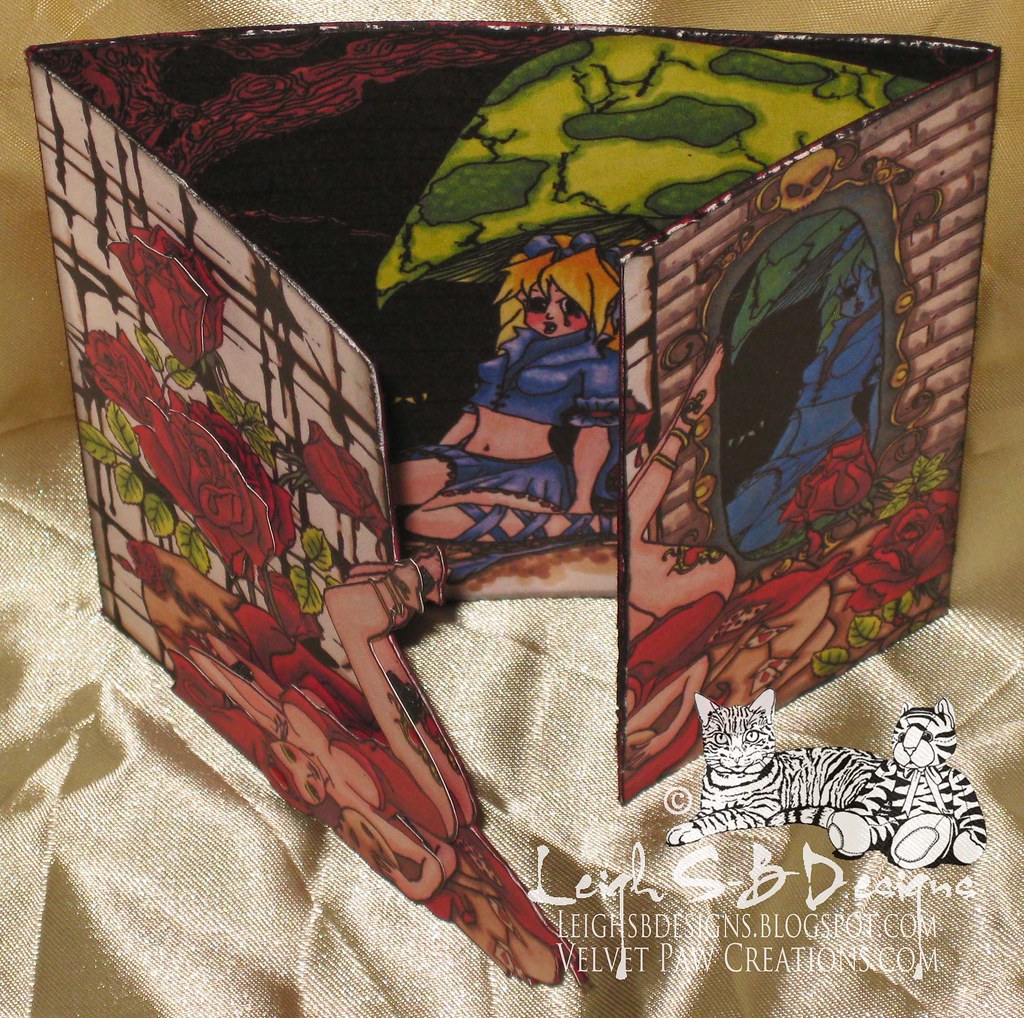
I scanned both images after colouring and printed out 3 copies of the Queen of Hearts image so that I could cut out sections to make the front of the gatefold card and create the dimensional layering. I printed out the coloured Alice image too so that the colouring would match and cut all the printed panels with my Perfect Squares tool. I made the gatefold card out of dark red cardstock embossed with Craftwell's 8.5 x 11" Regency embossing folder which I ran through my eBosser machine (now available at Crafter's Companion). I scored the fold lines on a TopScore Multiboard and adhered a portion of the Queen of Hearts image to the left hand panel. This panel is cut along the Queen's legs. I cut another of the Queen of Heart images and adhered the 'Alice in the Looking Glass' side of the design to the right hand panel making sure the Queen's legs lined up.
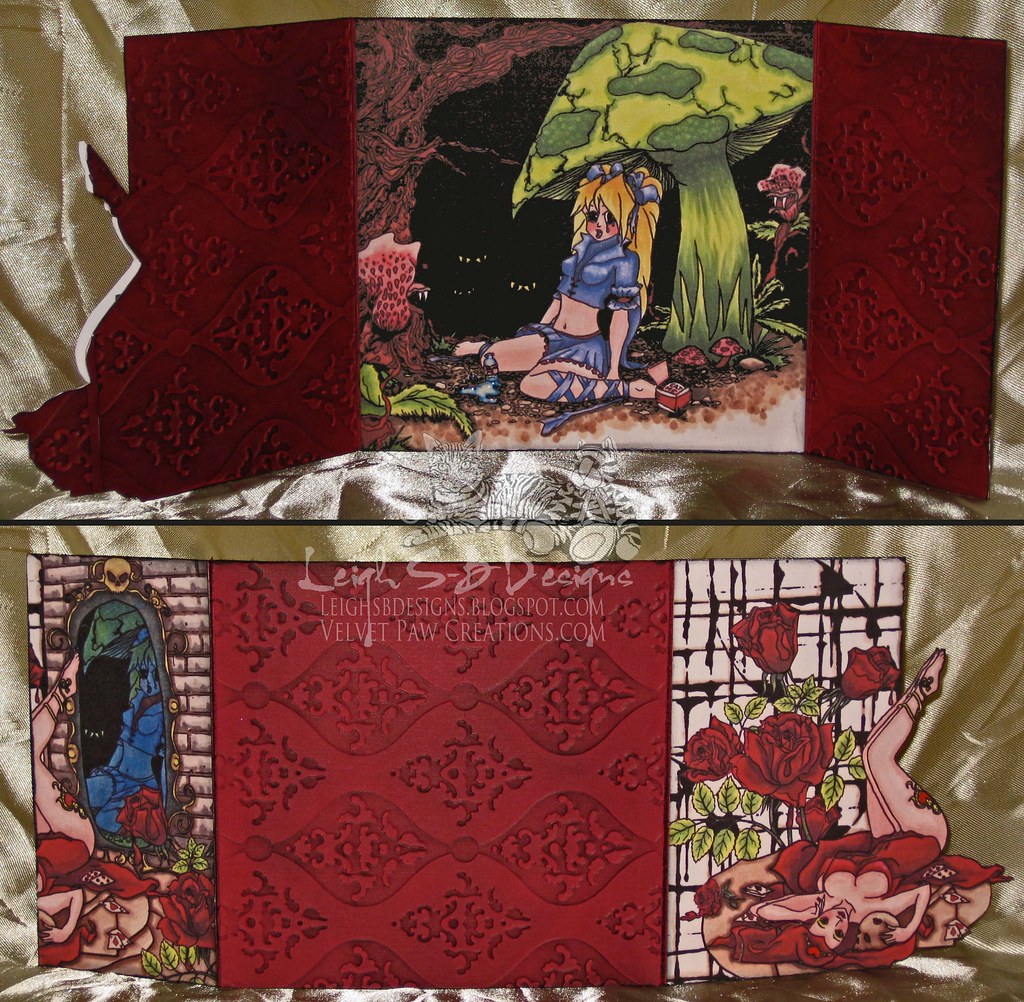
The image of Alice in the looking glass gives you a peek through to the inside of the card. Open it and see the very forlorn Alice image adhered inside. Run Tim's paper distresser tool around all the card edges to tatter them and then apply Black Soot Distress Ink with a foam ink applicator tool to all the edges and to the embossed design.
I scanned both images after colouring and printed out 3 copies of the Queen of Hearts image so that I could cut out sections to make the front of the gatefold card and create the dimensional layering. I printed out the coloured Alice image too so that the colouring would match and cut all the printed panels with my Perfect Squares tool. I made the gatefold card out of dark red cardstock embossed with Craftwell's 8.5 x 11" Regency embossing folder which I ran through my eBosser machine (now available at Crafter's Companion). I scored the fold lines on a TopScore Multiboard and adhered a portion of the Queen of Hearts image to the left hand panel. This panel is cut along the Queen's legs. I cut another of the Queen of Heart images and adhered the 'Alice in the Looking Glass' side of the design to the right hand panel making sure the Queen's legs lined up.
 )
)The image of Alice in the looking glass gives you a peek through to the inside of the card. Open it and see the very forlorn Alice image adhered inside. Run Tim's paper distresser tool around all the card edges to tatter them and then apply Black Soot Distress Ink with a foam ink applicator tool to all the edges and to the embossed design.
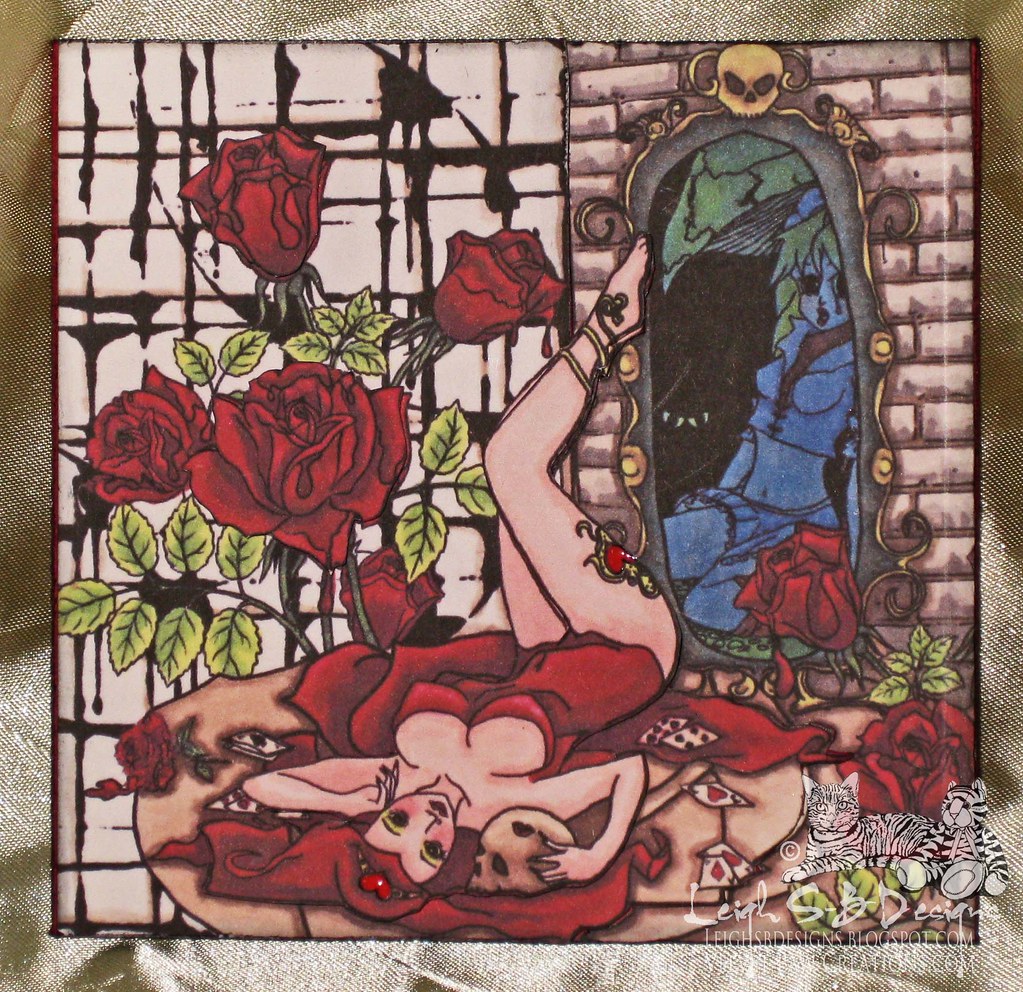
Fussy cut out two roses from the left over portion of the second Queen of Hearts print and adhere them to the left panel with black foam dots. Fussy cut out the Queen from the 3rd print along just one leg, a portion of her body and around her arms and head and adhere it to the card front with black pop dots too. You can see all the fun dimension in the photo below.
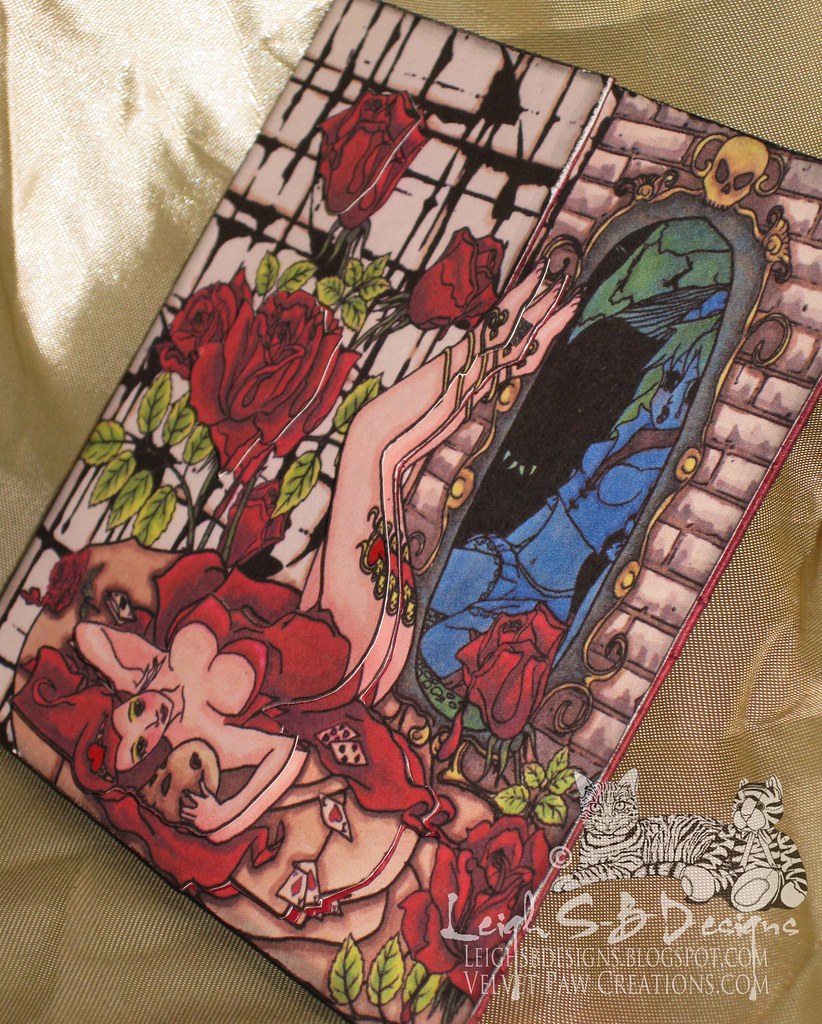
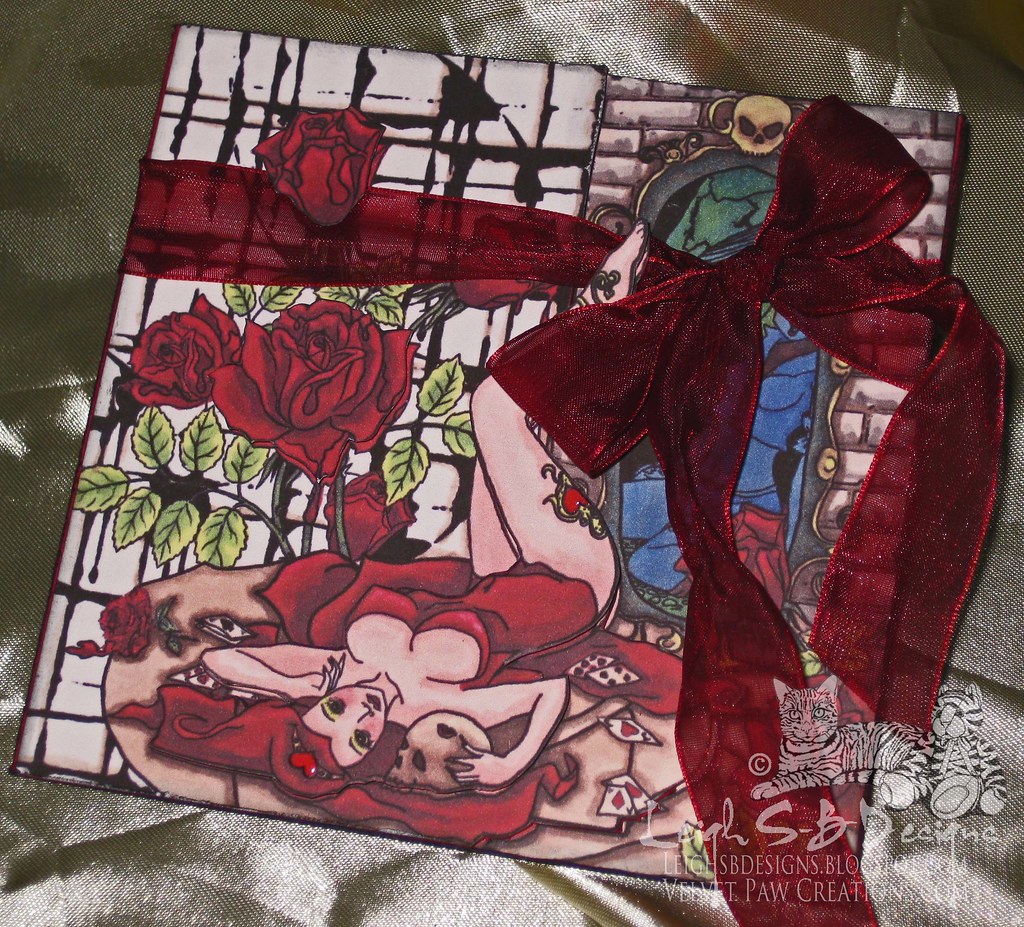
Apply Inkssentials Matte Accents to the heart on the Queen's leg, her head and also on the glass bottle and spilled liquid in the Alice image to make them stand out. Fold the card and wrap a dark red organza ribbon around it and tie in a bow!
Thanks for visiting with me today and have a great week!
I've entered the following challenges:
Smudgy Antics - Make a Gatefold Card
Crafter's Companion Feb Challenge - Love is in the Air
Color Me Creative Copic Challenge Group #61 - Colour with Texture
Copic Marker Europe - Anything Goes
Digi Haven - Love or Valentine
Simply Create Too #30 Valentine's Day or Hearts
Delicious Doodles #21 - Red, Red and More Red
My Sheri Crafts #103 - Valentines
Hiding in my Craft Room #83 - Reds
365 Cards #33 - Colour Like Crazy
Twisted Tuesday Challenges #42 - 5th Tuesday Free For All
My Sheri Crafts #103 - Valentines
Hiding in my Craft Room #83 - Reds
365 Cards #33 - Colour Like Crazy
Twisted Tuesday Challenges #42 - 5th Tuesday Free For All
Happy Stamping!

THE SHARPIE DOMINO QUEEN


0 Yorumlar